Homepage
•
Learning Library
•
Blog
•
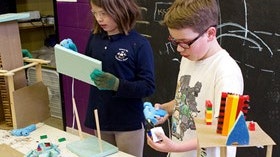
Inexpensive making in the classroom
Expand breadcrumbs
Expand breadcrumbs
- Learning Library
- Blog
- Inexpensive making in the classroom
- Homepage
- •
- Learning Library
- •
- Blog
- •
- Inexpensive making in the classroom
Inexpensive making in the classroom
By Stephanie Grimes
June 26, 2014